Most people buying a budget 1080p webcam setup get the order of operations backwards. They buy the camera first, plug it into a laptop, sit down with a window at their back, and then spend three weeks telling anyone who will listen that the webcam is bad. I have watched that exact sequence play out for eight years, first on Twitch and now on corporate calls where a client's CFO looks like a witness sketch on a camera that cost more than my first car.
Here is the thing I keep saying to people: the sensor is the camera, but the light is the picture. A budget webcam in good light will beat a flagship in bad light every single time, and the two cameras below are the cheapest clean 1080p feeds I know of that do not require a driver fight to work in OBS. The rest of this guide is the setup work that makes a twelve-dollar camera look like something you paid four times as much for.
Why you should trust me
I have been streaming and shooting video since 2018, starting on Twitch and drifting into corporate production work where the client actually notices when skin tones look wrong. I have run a weekly podcast on camera for years, which means I have sat in front of a webcam at 9 p.m. on a Tuesday and watched it hunt focus during a sentence about quarterly numbers. I have owned the Logitech C920, the Brio, the Elgato Facecam, the Razer Kiyo Pro, and more no-name Amazon cameras than I can list.
What that taught me is boring and useful: the camera matters less than where you point it and what is behind you. The cheap cameras are not bad. They are just usually set up badly. I am not going to hand you a spec sheet and pretend a twelve-dollar sensor has the dynamic range of a Brio. I am going to tell you what a cheap camera can actually do when you stop sabotaging it.
How I picked these two
The filter for this guide was simple and slightly brutal. The camera has to be 1080p, it has to be USB plug and play with no proprietary software required to get a picture, it has to mount on a monitor or a laptop lid without wobbling, and it has to sit in the budget bracket where most people actually shop. If a camera needs a driver install just to change exposure, it is a toy, and it does not make this list.
I also weighted two things that matter more at this price than anywhere else. First, a privacy cover, because a cheap camera that you leave plugged in should have a physical shutter and not a software toggle. Second, any kind of automatic light correction, because the people buying a ten-dollar webcam are also the people who will not buy a key light, and auto exposure is the only thing standing between them and a silhouette.
A caveat before the picks. At this price you are buying a sensor, a lens, a cable, and a plastic clip. You are not buying build quality you will pass down to your kids. Treat both of these as two-year cameras and you will be happy with them.
The two cameras worth setting up
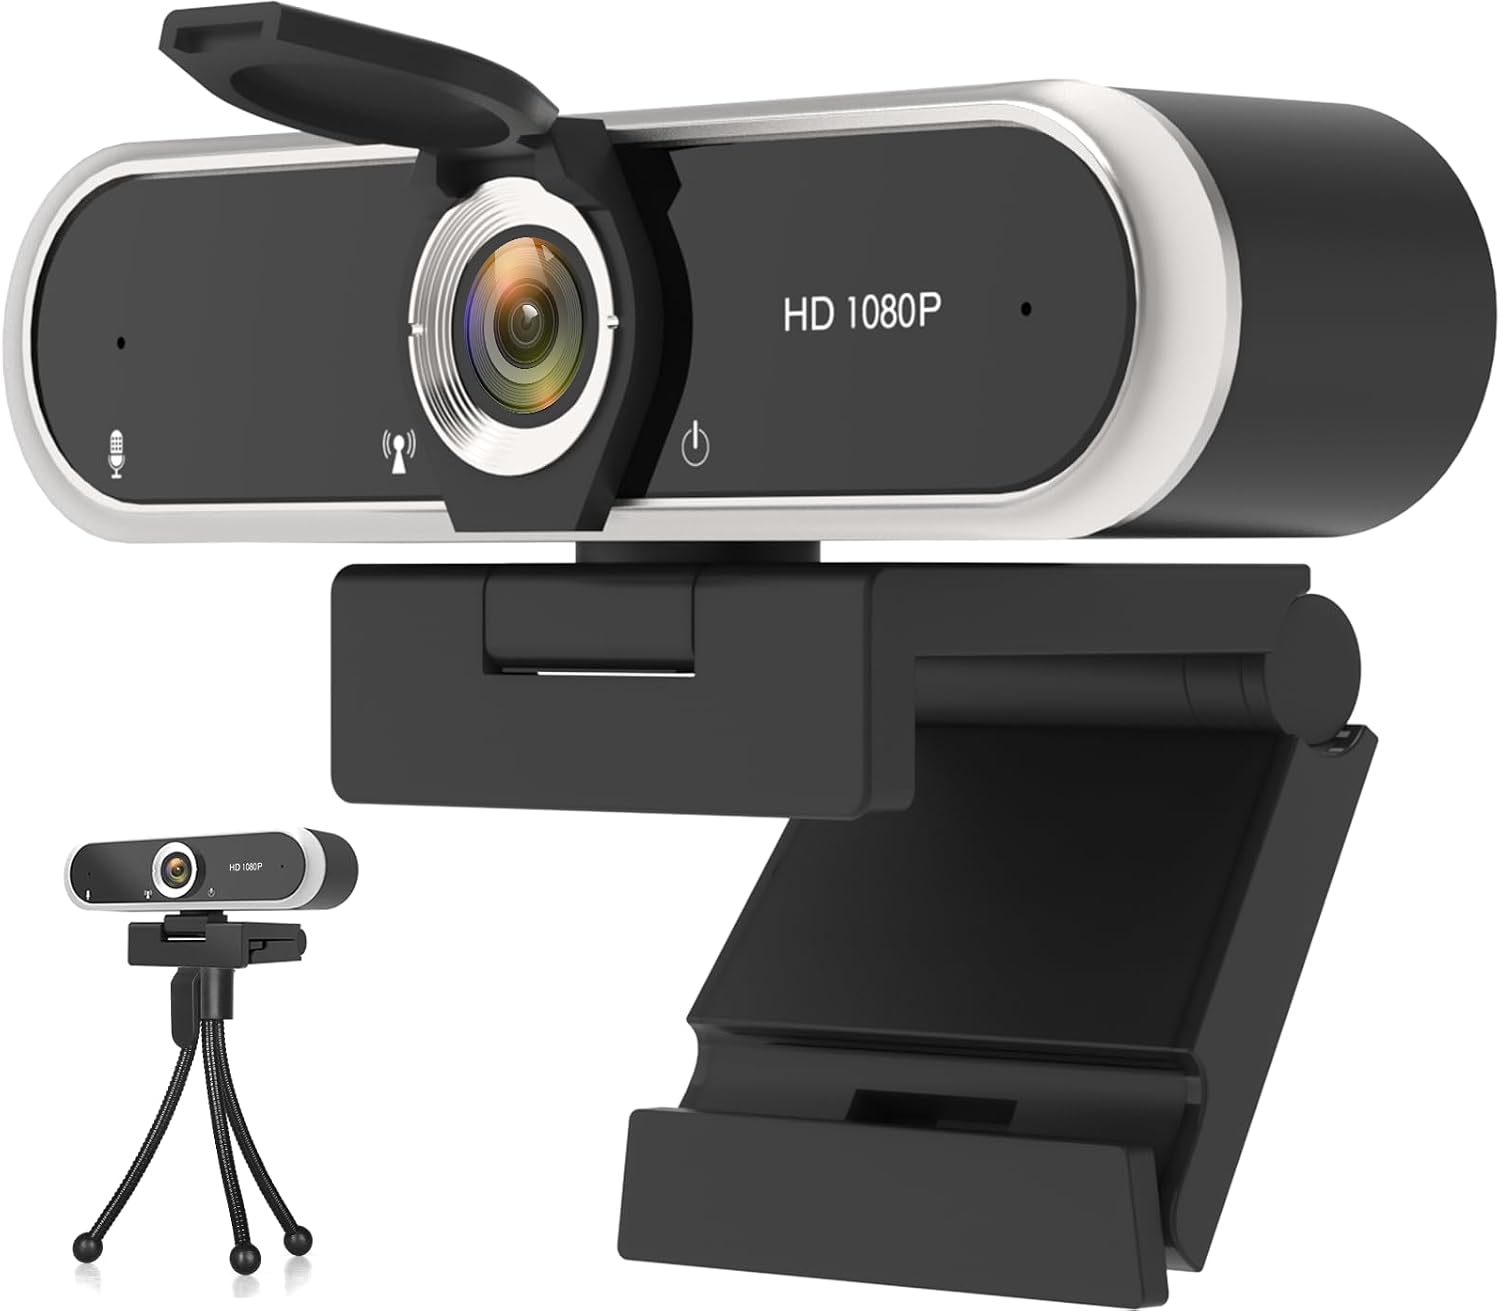
Our pick: Webcam 1080P with Microphone & Privacy Cover for PC/Laptop, USB Computer Camera Plug & Play with Auto Light Correction for Video Calls, Live Streaming Gaming & Online Meetings
 Visit on Amazon →
This is the one I would hand to a friend who is starting a channel, joining a remote job, or finally getting off a laptop's built-in camera. The reason is in the name: auto light correction plus a privacy cover. Auto light correction is the feature that saves a cheap camera, because it adjusts exposure on the fly instead of locking to whatever the room looked like when you plugged it in. Combined with a real shutter you can slide closed, it covers the two failure modes that make people hate budget webcams.
The mounting situation is standard, which is what you want. It clips a monitor or folds onto a laptop lid, and the USB connection is the whole install. Plug it in, let the operating system see it, and pick it in your app. No companion software, no account, no firmware updater that reboots your machine mid-meeting.
Flaws but not dealbreakers: The built-in microphone is a backup plan, not a purchase reason. It will get you through a call, and it will also pick up your keyboard and your ceiling fan. If you do anything with an audience, buy a separate mic. Also, auto exposure and a strong key light can fight each other, so if you light your desk properly, consider turning the correction off and setting exposure manually.
Anyone who wants one cable, one camera, and a feed that looks intentional on a Zoom call or a first stream should start here. Check current Amazon price before you commit, since this bracket moves.
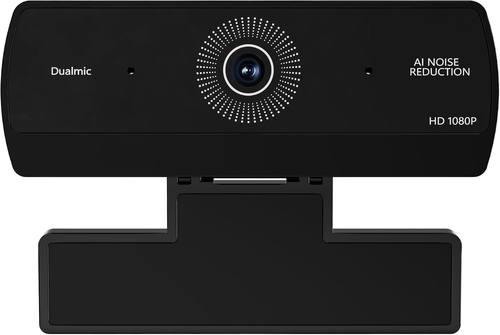
Runner-up: Webcam for PC, HD 1080P USB Plug-and-Play Computer Web Camera, High Definition Webcam for Desktop Laptop, Ideal for Online Class, Video Conference, Live Streaming & Gaming
 Visit on Amazon →
The runner-up is the bare-bones version of the same idea, and for a lot of people it is the smarter buy. It is 1080p, it is USB plug and play, and it mounts on a desktop monitor or a laptop the same way. What it does not bring is the auto light correction and the privacy shutter, so it asks more of you. That is a fair trade if you already have decent light and you do not care about a physical cover.
I would put this one in a spare room, a kid's desk for online class, or a second machine where the camera is a utility and not a presentation. It does the one job that matters, which is turning a laptop into something that shows your face at a resolution people can read.
Flaws but not dealbreakers: With no auto light correction, exposure is whatever your software decides, and cheap software decides badly. Budget five extra minutes to set brightness manually in your app and it behaves. The mic is the same story as the pick above: fine for a call, wrong for a podcast.
Anyone on a tight budget who already owns a lamp and a desk should grab this and spend the savings on lighting. Check current Amazon price, because the gap between these two moves around.
The actual setup workflow
This works for either camera, and it takes about twenty minutes. Do it in order. Skipping to step five is how people end up blaming the hardware.
Step one: fix the light before you touch the camera. Put your brightest light source in front of you, not behind you. A window behind your chair is the single most common reason a webcam looks terrible, because the camera exposes for the window and turns you into a silhouette. If you cannot move your desk, close the blinds and turn on a lamp in front of you. A cheap ring light or even a desk lamp bounced off a wall will do more for your image than any upgrade in this article.
Step two: get the camera to eye level. A webcam sitting below your chin looks up your nose and makes you look tired. A webcam above your head looks down and makes you look small. Stack books under a desktop camera or tilt the clip so the lens sits at your eyeline. This one change is free and it is worth more than most software settings.
Step three: check what the camera sees. Open your camera app and look at the frame before you join anything. The top of your head should not be cut off, and neither should half the room. If the field of view is wide, move the camera closer to your face rather than zooming, because zoom on a cheap sensor just softens the image.
Step four: set exposure and white balance manually if you can. Turn off auto exposure if the option exists and set brightness so your face is not blown out. Set white balance to the light you are actually using, not auto, if your app allows it. Auto white balance drifts mid-call when a cloud passes, and that drift is what makes you look green for four seconds.
Step five: turn off every beauty filter and background blur you did not ask for. Background blur on a cheap camera smears your ears into the wall. Beauty filters smooth your skin into a wax figure. Turn them off and let the sensor do its job.
Step six: pick the right resolution and frame rate in your app. In OBS or Zoom, set the camera to 1080p at 30 frames per second, not 1080p at 60 if your machine is older. Most budget cameras can do 30 cleanly and struggle at 60. A smooth 30 beats a stuttering 60 every time.
Step seven: lock focus if you can. If your app has a manual focus or a focus lock, use it. Autofocus that hunts during a sentence is the number one webcam annoyance, and on a fixed-focus budget camera you get a pass on this because there is nothing to hunt. That is a quiet advantage of cheap cameras.
Step eight: test record thirty seconds before you go live. Say a sentence, move your hands, lean in and back. Watch it back. If the exposure jumps when you move, your auto correction is fighting your lamp. Turn the correction off and set exposure manually.
Step nine: deal with the cable. Loop the USB cable once and tape it to the desk or clip it to the monitor stand. A camera that gets yanked off the lid mid-call because your chair rolled over the cord is a self-inflicted wound.
Where both of these fall short
Neither camera will save you in a dark room. If your only light is a monitor and a dim ceiling fixture, no 1080p sensor at this price is going to produce a clean image, and you should spend your money on a lamp first. That is not a knock on these cameras, it is physics.
The built-in microphones are the other weak spot. They are there so the product can call itself a webcam with a microphone, and they will handle a casual call. They will not handle a stream, a podcast, or anything where your voice is the product. Budget for a separate mic if you are doing this seriously.
And neither one is a 4K camera, which is fine, because almost nothing you do delivers 4K to the other end anyway. A clean 1080p feed with good light beats a soft 4K feed in a dim room, and anyone selling you "4K Ultra HD" under a hundred dollars is selling a sticker.
What the alternatives cost you
The obvious step up from here is the Logitech C920, which has been the default recommendation for a decade and still earns it. Above that sits the Brio for people who want field-of-view options and better dynamic range, and the Elgato Facecam for streamers who are tired of autofocus hunting. If low light is your actual problem, the Razer Kiyo Pro has a bigger sensor and it shows, though the software is clunky. The Insta360 Link is for presenters who want tracking and will pay for it.
None of those are wrong purchases. They are just three to ten times the money, and if your lighting is bad, they will still look mediocre. Buy the light first. Buy the camera second. The two cameras in this guide exist so that the second purchase does not eat your whole budget.
What this all costs
The math here is simple. Both cameras sit in the single-digit-to-low-teens bracket, so check current Amazon price on each and pick the one with the features you actually need. The pick with auto light correction and the privacy cover costs a little more and asks less of you. The runner-up costs less and asks you to handle exposure yourself.
The lamp is the real purchase. A desk lamp you already own, repositioned in front of you, is free. A cheap ring light is a one-time cost that will outlive both cameras. The setup time is twenty minutes you spend once.
Do the light, do the eye level, do the manual exposure, and then leave it alone. That is the whole job, and a budget 1080p webcam done right will hold its own against setups that cost ten times as much.