Most people set up a 4K webcam backwards. They plug it in, open the camera app, see a gray, washed-out version of their own face, and immediately start shopping for a better camera. A proper 4K webcam setup rarely needs a new camera at all. It needs ten minutes of correct order-of-operations.
I have been running cameras for eight years, first on Twitch and now on corporate video work out of Austin, and the pattern never changes. The people who look good on camera are not the ones with the most expensive gear. They are the ones who fixed their light, locked their exposure, and stopped letting autofocus decide where the story is.
This is the order I work in every time. No proprietary utility required, no driver fight, and nothing you have to buy before you try it.
Why you should trust me
I have been on camera weekly for eight years. I started on a Logitech C920, worked through the 4K flagships, and I still run a weekly podcast with my face in the frame, so I live with the consequences of every setting I recommend.
Every camera that lands on my desk gets the same treatment: the same key light, the same desk position, the same OBS scene, and one question at the end, which is whether my face looks like me. I do not care what the box says. I care what the sensor is and whether the thing behaves in the software I already use.
That is the whole test. If it needs a vendor app to change exposure, it does not get a second session.
How I judge a webcam before it earns a spot on the desk
Four things, in this order.
Sensor size. The imaging chip is the camera. "4K Ultra HD" printed on a tiny sensor is a sticker, not a quality jump. A larger sensor collects more light per pixel, which is what gives you clean skin tones in a dim room instead of mush.
Autofocus behavior. Phase-detect autofocus locks fast and quietly. Contrast-detect autofocus hunts, and hunting during a podcast is the single most annoying thing a webcam can do. Bonus points if the camera lets you lock focus manually.
Field of view. Roughly 90 degrees is right for desk work where your hands are in frame. Something in the 65 to 78 degree range is right for a solo face shot, because it stops your room from eating two thirds of the picture.
Software behavior. If it is a standard USB video class camera, OBS sees it with no driver fight, and that is the bar. Any camera that only unlocks its real settings inside a proprietary app is a toy with a lens.
The camera this guide is built around
The workflow below works with almost any modern webcam. The camera I would point a first-time streamer at is the one below, and it happens to check the boxes I care about most: a real sensor, fast autofocus, and standard USB behavior.
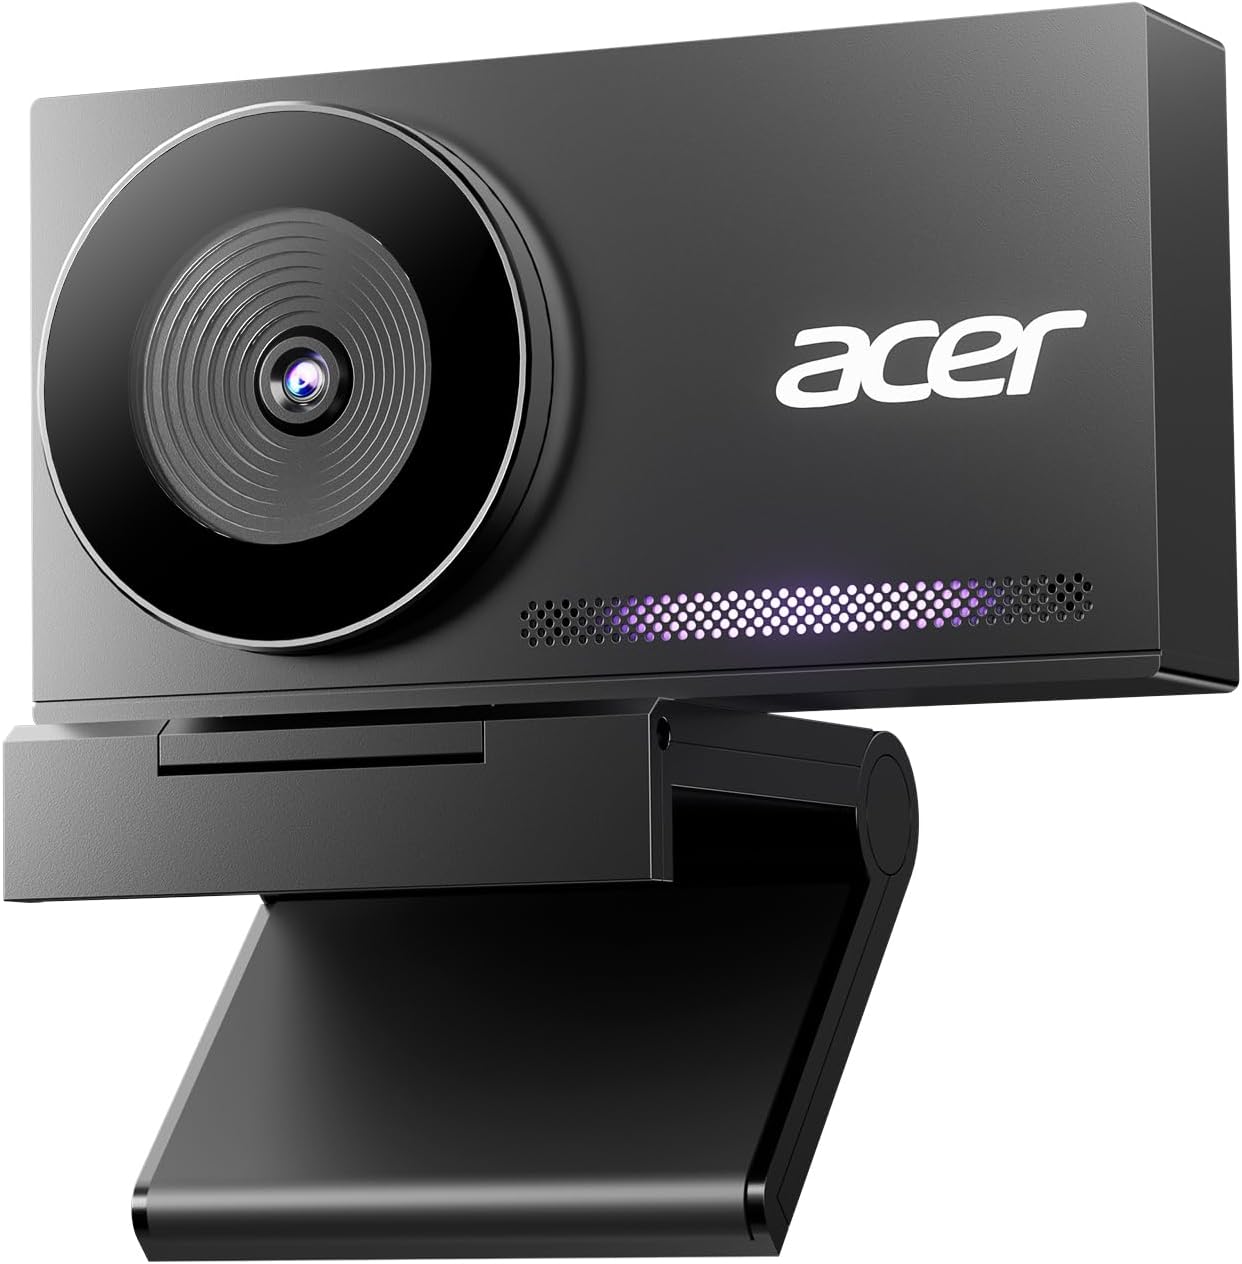
Our pick: Acer 4K Webcam for PC/Mac with All-Metal Unibody Sculpted, Sony 1/2" Sensor, PDAF, 2 Noise Reduction Mics, Privacy Cover, Lightweight, Fast Cooling, Streaming Camera for Live Meeting Commerce Gaming
 Visit on Amazon →
The line that matters here is the Sony 1/2" sensor, not the 4K badge. A half-inch sensor is a genuinely useful size for a desk camera, and it is the reason this one can hold skin tones together in a room that is not lit like a studio. The PDAF autofocus is the other spec I care about, because phase detection is what stops the camera from breathing in and out while you talk.
The rest of the package is sensible rather than flashy. An all-metal unibody means it sits on top of a monitor without wobbling. There is a privacy cover for the days you are not streaming. There are two noise reduction mics, which I treat as a backup plan, not a podcast mic. And it is a standard USB camera, so OBS picks it up without an argument.
Flaws but not dealbreakers: A webcam mic is still a webcam mic. The two mics here are fine for calls and thin for a show. Plan on a separate mic if you are recording anything you care about.
Anyone building a first streaming setup, or replacing a laptop camera that makes them look like a witness sketch, should start here.
If you are outfitting a room for a client: Design-Build Project Delivery: Managing the Building Process from Proposal Through Construction
 Visit on Amazon →
The moment your webcam setup stops being one desk and becomes a room, a studio corner, or a client's conference space, you are running a small construction project. Cabling, power, lighting positions, acoustic treatment, who signs off on the layout. That is a project delivery problem, and this book is the reference for the proposal-through-construction side of it.
If you are the person who has to spec a room and then defend the spec, this is the reading I would do before the first site walk.
Flaws but not dealbreakers: It is a process book, not a gear book. You will not find camera recommendations in it, and that is fine. That is what this article is for.
Anyone managing a build-out, a shared studio, or a corporate AV refresh should keep it on the desk.
The setup workflow, step by step
Step one: put the camera at eye level. Height is the biggest free upgrade in this entire article. A camera sitting on a laptop lid looks up your nose and flattens your face. Move it to the top of your monitor, or put it on a tripod or a boom arm, so the lens sits level with your eyes. You should be able to look straight into the lens without tilting your chin.
Step two: fix the light before you touch a single setting. No menu fixes a bright window behind you. Put your main light in front of you and slightly to one side, and higher than your face, so the shadow falls under your chin rather than across your eyes. If you have a window, face it. If your only light source is the ceiling fixture, that is the first thing to change, because a cheap LED panel will do more for your picture than a camera upgrade.
Step three: set your field of view and framing. For a solo face shot, use the narrower end of what the camera offers. For desk work with your hands in frame, go wider. Then crop so your head and shoulders fill the frame with a little breathing room above your head. If the camera ships with field-of-view modes, pick the one that matches how you actually sit.
Step four: lock exposure. Auto exposure adjusts every time you move, so you flicker between bright and dim as you gesture. Open the camera's properties inside OBS and set exposure manually if the camera exposes those controls. If it does not, hold your lighting constant and keep your position steady, because auto exposure behaves far better in a room that is not changing.
Step five: set white balance manually. Auto white balance drifts, and drifting white balance means your skin tone changes mid-stream. Pick a preset such as daylight and leave it alone. Consistency matters more than a perfect number here.
Step six: deal with autofocus deliberately. Phase-detect autofocus like the kind in the camera above is quick and quiet, but it still needs light to work with. Lock focus if you can and stay at your desk. Never sit with a bright window behind you and your face in shadow, because that is the classic trigger for a camera to start hunting.
Step seven: build the OBS scene. Add a Video Capture Device source and pick your camera by name. Set the resolution to what the camera actually outputs rather than a number you like the look of, and match the frame rate to your stream output. Plug the camera directly into a port on the computer, not into a hub, and especially not into a hub shared with an external drive, because 4K video eats USB bandwidth faster than you expect.
Step eight: fix the audio path. The webcam mic is a backup, not the plan. If you own a USB or XLR mic, use it and disable the webcam audio in OBS so it cannot sneak into the mix. If you are stuck with the webcam mic, bring the camera closer, kill the fan and the AC, and turn on noise suppression. It will get you through a call. It will not carry a podcast.
Step nine: record five minutes and watch it back. Full size, with headphones. Check lip sync, check whether focus moved when you leaned in, check whether your background is blown to white, and check whether the color shifts when you wave a hand across the frame. Fix one thing and record again. Two passes and you are done.
The problems you will actually hit
Autofocus hunting. Nine times out of ten this is a lighting problem, not a camera problem. Add front light, reduce backlight, and lock focus if the camera allows it.
A grainy picture in a dim room. Small sensors in dark rooms are grainy, and no setting rescues them. Add light. This is why I check sensor size before anything else.
Banding or flicker. Usually a mismatch between your shutter speed and your room lights. Adjust the shutter to a value that plays nicely with your local power frequency and the bands disappear.
Washed out and flat. Auto exposure is exposing for your bright background instead of your face. Light yourself from the front and lock exposure.
The camera drops resolution or stutters. USB bandwidth. Move it to a direct port, shorten the cable, and unplug whatever else is sharing that controller.
Looks fine in the camera app, looks wrong in OBS. The two apps are using different resolutions or formats, or a second app is holding the camera open. Close the other app and match the settings.
What this all costs
The software is free. OBS costs nothing, and every setting in the workflow above lives inside it. The lighting is the part people skip, and it is the part that decides whether your camera looks expensive. The camera itself is a one-time purchase, and the reading above is a one-time purchase.
The order of spending matters more than the total. Light first, then a real microphone, then the camera. A great camera with bad light and a laptop mic is a downgrade from a mediocre camera with good light and a decent mic.
Check current Amazon price on the camera, check current Amazon price on the book, and spend the rest of your budget on a light you will still be using in five years.
That is the whole job. Position, light, exposure lock, focus lock, OBS, audio, test recording. Do it once, save the scene, and never think about it again.
Your camera was built to do this. Let it.