Most webcams get plugged in and never configured. Your video app picks a default resolution, some auto exposure routine fights whatever is happening behind you, and the picture drifts between too dark and blown out for the entire call. Nobody says anything, because everyone else on the call looks the same way.
A Logitech webcam setup is not a hard job, but it is a specific one. You are deciding where the camera sits in the room, what light lands on your face, which resolution and frame rate the sensor actually feeds your software, and which settings get locked so nothing shifts halfway through a sentence. Get those four things right and a mid-range camera looks like a studio. Get them wrong and a good camera looks like a witness sketch.
This is the order I work in: mount, light, resolution, exposure and focus, then audio. The two cameras below are the ones I point people toward when they want a dependable 1080p picture without flagship money, and the workflow applies to both of them, plus most other USB webcams you already own.
Why you should trust me
I have been behind a camera for eight years, starting on Twitch and moving into corporate video work around Austin. I run a weekly podcast on camera, and I have set up enough webcams to know that the box does not tell you much. What tells you something is the sensor behind the lens, the published field of view, and whether the camera shows up in OBS without a driver fight.
I do not publish numbers I cannot stand behind, and I do not recommend a camera I would not put on my own desk. My bias is simple: lighting beats hardware, a real sensor beats a marketing sticker, and any camera that makes you fight proprietary software to change a setting is a toy with a lens on it.
What I check before recommending either camera
Four things decide whether a webcam is worth your time.
The lens and sensor, not the resolution on the box. A 1080p camera with a decent glass lens beats a "4K" camera with a tiny sensor every time, because the sensor is the camera.
Fixed focus or hunting autofocus. Autofocus is a feature right up until it hunts during your second sentence. A fixed focus lens cannot hunt, which is why it works so well for talking-head video.
Field of view. Wider is not better. You want a view that frames your face and shoulders at normal desk distance without turning you into a tiny figure in a big room.
How it behaves in OBS and Zoom. Both cameras below are UVC, the standard driver class, which means they enumerate as a normal capture device. No driver fight.
Pick the camera that matches your job
Both of these are the same family of Logitech camera, and both are aimed at the same person: someone who wants a reliable 1080p image for meetings, streams, or recording, without spending flagship money. The differences come down to frame rate and what you are willing to accept on a renewed unit.
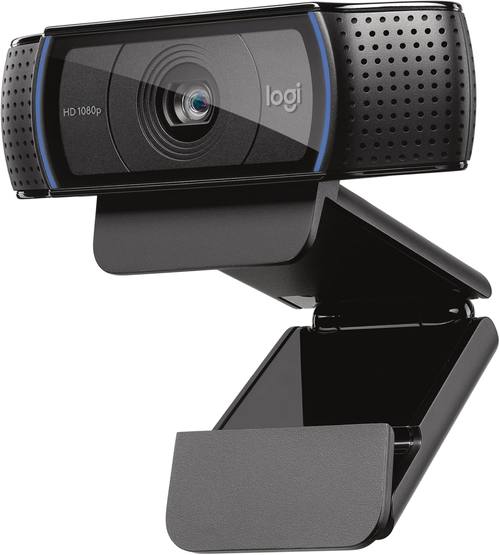
The desk default: Logitech C920x HD Pro PC Webcam Full 1080p/30fps Video - Black
 Visit on Amazon →
The C920x is the camera I hand to people who just want their calls to look right. It delivers 1080p at 30 frames per second, with a glass lens and Logitech's published 78-degree diagonal field of view, which is wide enough for a desk and narrow enough that your face is not a postage stamp in the frame.
It is fixed focus, so there is no autofocus to hunt while you talk, and it has a standard tripod thread on the bottom plus a clip that grips a monitor. The dual microphones are usable for a backup, but treat them as a backup. Check current Amazon price.
Flaws but not dealbreakers: No 60fps option, so fast motion will smear. The clip grips thin panels better than thick ones, and the whole body is plastic. Since it is fixed focus, you cannot shove it close to your face and expect sharpness.
Anyone whose main job is video meetings, a podcast, or a talking-head YouTube channel should start here.
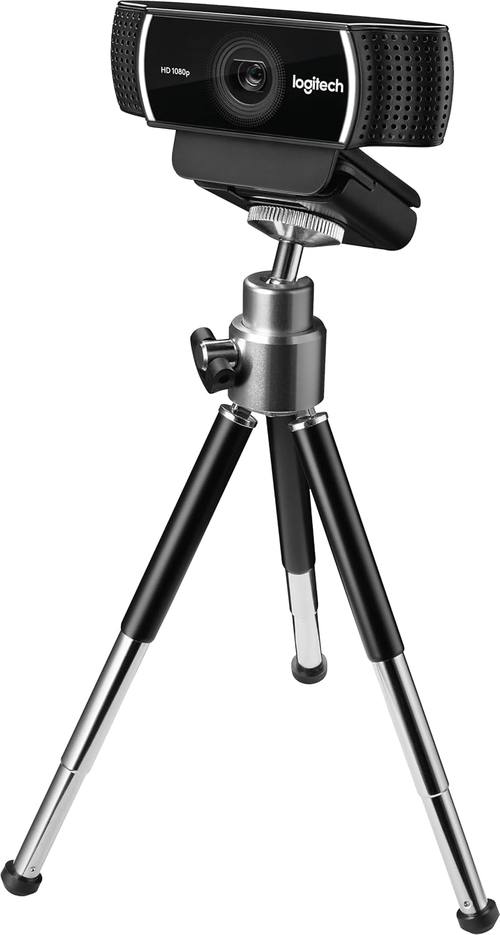
The streaming pick: logitech C922 Pro Stream Webcam 1080P Camera for HD Video Streaming & Recording 960-001087(Renewed)
 Visit on Amazon →
The C922 Pro Stream is the same idea with a faster option: 1080p at 30fps for talking-head work, or 720p at 60fps when you need smoother motion for gameplay, hand gestures, or anything that moves. Same family of lens, same fixed focus behavior, same UVC plug-and-play in OBS. If you stream rather than meet, this is the one that gives you a choice. Check current Amazon price.
This listing is a renewed unit, which is worth being clear about. Renewed does not mean broken, it means someone else owned it first and it was inspected. What you should verify the day it arrives: the glass is clean and unscratched, the cable is the original type and not a random substitute, the camera enumerates in OBS as a capture device, and the return window is real and long enough for you to record a test clip. Confirm what the listing includes, because renewed stock does not always ship with the same accessories as new.
Flaws but not dealbreakers: Renewed stock varies, so a slow return process is the only real risk. No autofocus, no 4K, and the low-light ceiling is the same as every other camera in this class.
Anyone who streams games or motion-heavy content and wants 60fps without paying flagship prices should look at this first.
The setup workflow, start to finish
Now the part you came for. This works on either camera, and on most other UVC webcams.
Step one: mount at eye level. The single biggest upgrade to any webcam is height. A camera sitting on a desk points up your nose and captures the underside of your chin. Put it on top of the monitor, or on a tripod behind the monitor at roughly your eye line. If you cannot get it high enough, raise the chair, not the camera angle.
Step two: light your face before you touch a setting. Face a window, not the back of one. A bright window behind you tells the camera to expose for the window and turns you into a silhouette. If you cannot face daylight, one soft light in front of you at about head height beats any camera upgrade you can buy. Kill overhead ceiling lights if they cast shadows down your face.
Step three: force the resolution your app should be using. In OBS, add a Video Capture Device source, open its properties, and set the resolution and frame rate manually to 1920x1080 at 30fps. In Zoom, Teams, and Meet, check the video settings and confirm 1080p is selected rather than letting the app choose. Plenty of software defaults to 720p or even 640x480, and the camera will happily deliver the lower number if you never ask for more. This one step is why so many people think their webcam is soft.
Step four: pick the frame rate for your content. Talking head and meetings: 1080p at 30fps. Motion, gameplay, or anything where hands move fast: 1280x720 at 60fps on the C922. Do not run 1080p at 60fps and hope, because neither of these cameras offers it.
Step five: lock exposure. Open the camera's properties dialog through your capture software and switch exposure from auto to manual if the option is there. Auto exposure is what makes your face brighten and dim every time you lean forward. Set it once in the light you actually work in, then leave it. If your app does not expose those controls, Logitech's own utility can set them, though I would rather not install a second piece of software just to reach a slider.
Step six: set white balance manually. Same logic. Auto white balance reads your wall and your shirt and decides the color of your skin based on both. With lights that do not change, pick the preset that matches them, usually the indoor or daylight setting, and stop moving between a warm lamp and a cool window mid-session.
Step seven: focus by distance, not by software. Because these lenses are fixed focus, there is nothing to adjust. Sit at a consistent distance from the camera, roughly arm's length to a couple of feet, and stay there. If you lean in close, you will go soft. That is the trade for never having the lens hunt while you talk.
Step eight: sort out audio last. The microphones built into both cameras are a backup plan, not the purchase. If your room has any echo, a desk mic or a lav will beat the on-camera mic every time. Point the camera at your face and put a real mic in front of it.
Step nine: record a test, not just a preview. The preview window compresses and rescales the image, so it lies to you. Record sixty seconds, watch it back at full size, and check three things: is your skin tone believable, is there detail left in the dark parts of the frame, and does the background look intentional. Fix the cheapest problem first, which is usually light.
Mistakes that make a good camera look bad
Backlighting. A window or a bright lamp behind you is the fastest way to make any webcam look cheap.
Leaving the app in charge of resolution. If you never set it, you are probably not getting 1080p.
Auto everything. Auto exposure, auto white balance, and auto gain all react to whatever changes in the room, and they will all drift during the call.
Mounting low. Desk height is nose height, and nose height looks like a security camera.
Cable chaos. Long, thin USB extensions and unpowered hubs cause dropouts, stutter, and cameras that vanish from the device list. Go straight into the machine, or into a powered hub you trust.
What these two cameras do not do
Neither one is a low-light camera. Neither one has a big sensor that rescues a dim room, and neither one shoots 4K. Neither has autofocus, which is a deliberate trade for stability. And neither one replaces a real microphone if you care about how you sound. If you need those things, you are shopping in a different price bracket, not a different brand.
What they do is deliver a clean, stable 1080p picture that behaves the same way every time you open OBS, which is worth more than a spec sheet when you are on camera four times a week.
What this comes down to
The camera is the cheapest part of looking good on video. Light, height, and locked settings do more for your image than any upgrade you can buy, and both of these Logitech cameras respond well to the same nine-step routine. Set the mount at eye level, put a light in front of you, force 1080p in the app, lock exposure and white balance, and record a test before you go live.
If you want the simplest reliable option, the C920x is the one to buy and forget about. If you want the option of smoother 60fps motion at 720p and you are comfortable verifying a renewed unit on arrival, the C922 Pro Stream is the better fit for a stream. Check current Amazon price on each and let the workflow do the rest. The camera was built to do this. Let it.